Coming into this photography class with Dave Shumway, I only had a basic idea of what it takes to shoot a decent photo and how to actually work a camera. I believe one of the most important things that I have learned in the class is knowing the importance of what each setting on the camera means. I never really paid much attention to what shutter speed did, aperture means, and even how ISO affects a picture. The exposure of each shot is important because that is what determines if your picture will be dark enough, light enough, too bright or dark, and so on. Knowing how to adjust for these settings really helps in how to make a picture really turn out how I want it to.
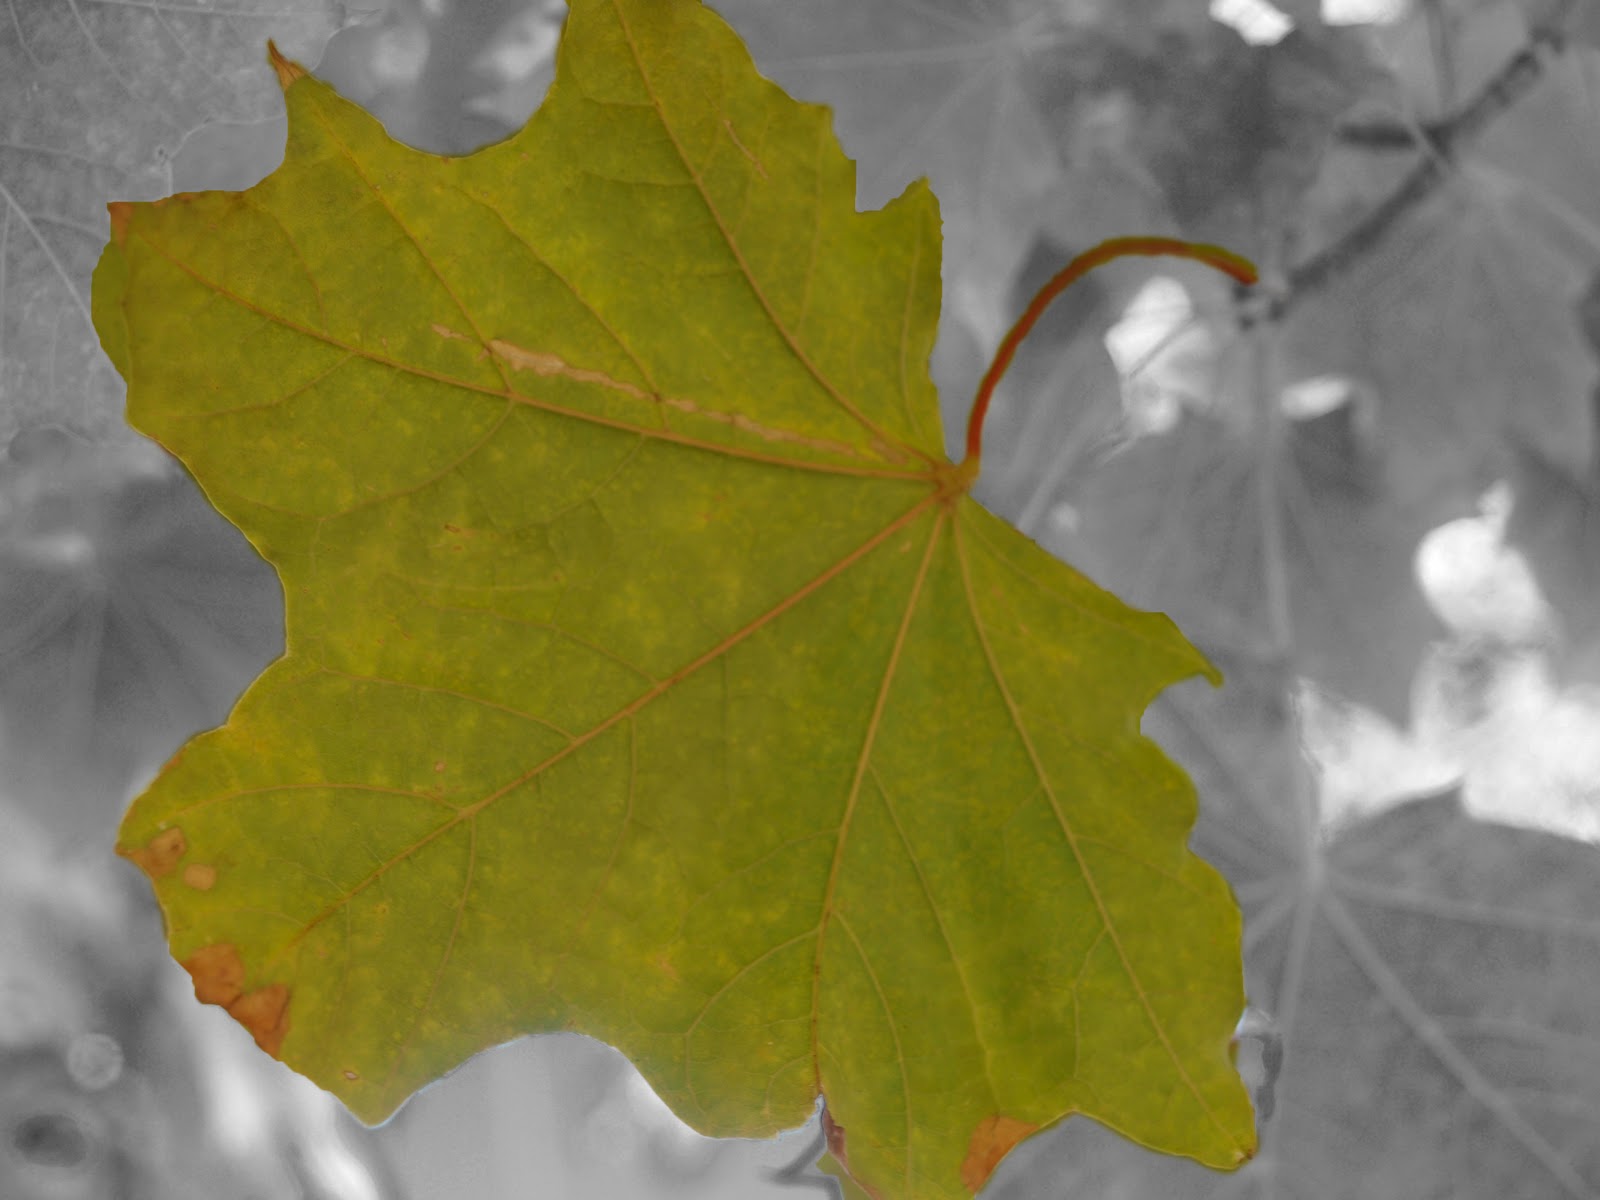
Another thing that was taught in the class through the book and emphasized a lot throughout was the importance of dominance. There are many things in a picture that will dominate over the others, and even help to make the picture work for a great picture instead of just a good one. A couple of these that I made sure to keep in mind while taking shots was the fact that red is more attractive than yellow, large is better than small, difference is more noticeable than conformity, and so on. Many of my shots recently have to do with large to small objects with a limited depth of field. Basically, I took many macro shots where there was one basic center of focus that I wanted with the most detail, and a background with less focus and even blurred.
Then to mess with the depth of field in larger shots, it was helpful to learn about things such as aperture priority, and even the different types of lenses that are useful in different situations. For those long landscape shots, a 500mm to 700mm lens would be the perfect lens in this action, for it would allow for that sufficient zoom level and long wide depth of field. Another bit of information that I found very useful covered I this class was the use of backlighting, front lighting, side lighting and more. These help for I know now that the best time to shoot is early morning sunrise, and also evening sunset. Also, another handy use of this class was a better understanding and usage of the photoshop program that I own.
One thing that I have always loved doing was working with photoshop, fixing up photos just a little more than what I took them at. Photo shop is one thing from this class that I will definitely carry on from this photography course. More importantly, I will be using the different exposure settings to ensure better quality of my photos, because I now have a better understanding to how the settings work.
Monday, December 6, 2010
Tuesday, November 23, 2010
Final Presentation Photos

Shot with an Olympus at 39mm, f/5.5, ISO 400, 1/30th of a second

Shot with Olympus E-420 at 42mm, f/22, ISO 1600, 1/15th of a second

Shot with Olympus E-420 at 42mm, f/5.6, ISO 400, 1/25th of a second

Shot with Olympus E-420 at 22mm, f/8, ISO 200, 1/60th of a second

Shot with an Olympus E-420 at 42mm, f/8, ISO 100, 1/80th of a second

Shot With an Olympus E-420 at 42mm, f/8, ISO 100, 1/80th of a second

Shot with an Olympus E-420 at 42mm, f/4.7, ISO 400, 1/60th of a second
Shot with an Olympus E-420 at 32mm, f/22, ISO 1600, 1/1250 of a second

Shot with an Olympus E-420 at 42mm, f/22, ISO 1600, 1/1250th of a second

Shot with an Olympus at 25mm, f/22, ISO 1600, 1/400th of a second

Shot with an Olympus at 42mm, f/5.6, ISO 100, 1/80th of a second

Shot with an Olympus E-420 at 42mm, f/5.6, ISO 400, 1/100th of a second

Shot with an Olympus E-420 at 17mm, f/3.6, ISO 400, 1/80th of a second

Shot with an Olympus E-420 at 14mm, f/3.5, ISO 400, 1/8th of a second

Shot with an Olympus at 42mm, f/5.6, ISO 400, 1/800th of a second

Shot with an Olympus E-420 at 24mm, f/8, ISO 100, 1/80th of a second

Shot with an Olympus E-420 at 30mm, f/8, ISO 100, 1/100th of a second

Shot with an Olympus E-420 at 42mm, f/11, ISO 100, 1/400th of a second

Shot with an Olympus E-420 at 36mm, f/10, ISO 100, 1/250th of a second

Shot with an Olympus E-420 at 40mm, f/5.6, ISO 100, 1/100th of a second
Shot with an Olympus E-420 at 42mm, f/8, ISO 100, 1/200th of a second

Shot with an Olympus E-420 at 42mm, f/5.6, ISO 400, 1/100th of a second

Shot with an Olympus E-420 at 36mm, f/10, ISO 100, 1/250th of a second

Shot with an Olympus E-420 at 42mm, f/5.6, ISO 400, 1/80th of a second

Shot with an Olympus E-420 at 29mm, f/5, ISO 200, 1/80th of a second

Shot with an Olympus E-420 at 42mm, f/8, ISO 100, 180th of a second

Shot with an Olympus E-420 at 31mm, f/6.3, ISO 200, 1/250th of a second

Shot with an Olympus E-420 at 37mm, f/6.3, ISO 200, 1/320th of a second

Shot with an Olympus E-420 at 21mm, f/6.3, ISO 200, 130th of a second

Shot with an Olympus E-420 at 42mm, f/6.3, ISO 200, 1/80th of a second

Shot with an Olympus E-420 at 31mm, f/8, ISO 100, 1/100th of a second
Tuesday, November 16, 2010
Part Four post
Part four in the book of Digital Nature Photography deals with three main ideas in light on the land. These three ideas go along with the process of finding photogenic landscapes, using the power of perspective while taking shots, and discovering the different types of nature’s natural mystical mirrors. A landscapes best indicator for the potential to be a great photograph is the presence of strong colors such as the most attractive color of red. Another addition that can help in making a great photograph of a landscape is the presence of clouds. One thing that it lists as important when you find a prospective landscape is to check the east and west horizons to see if they are clear of light-obstructing landforms, which is important to consider no matter what angles you choose to shoot at.
When photographing a landscape it is also important to keep foreground details in mind because they can help set a scene in combination with the landscape itself, the sky, and other layers in a landscape. There are also possibilities of finding small pools of water along trails or potential landscapes, which can turn out to be great use of a shot where one uses reflection as an added source in a great photograph. The best landscapes are also those in where there are no human abstracts such as light poles, fences and such. The book suggests finding peaceful landscapes in areas such as natural parks and forests, or land with minimal human territorial areas that wildlife may roam in peace. This leads into using the environment to your advantage with the power of perspective.
The book has an emphasis to be creative while setting up your shots and use things such as size cues and different angles of view. An example of both would be like shooting a landscape where you include flowers that are close to you in the landscape shot by lowering the level of the camera closer to them and keeping the rest of the shot in it as well. One aspect of shooting a landscape that the book emphasizes to do is make sure to use at least five, six, or more layers to give the photograph its perspective and depth so that way it is not too bland. The last section talks about the many mirrors in nature that a photographer may use to make an interesting photograph. Water is probably the best form of a natural mirror, and in order to get a great shot while using water as the reflector may require you to get down, dirty, and possibly wet.
Other reflectors in nature may include ice, crystal formations (although more or less rare), and just the simple use of filters may be necessary. It is important to keep in mind as well, that light is a big factor in the use of reflections.
Thursday, November 11, 2010
part three
Part three in Nature Photography focuses on photographing wildlife in sense, and has three main sections of getting close to animals, catching animals in action, and capturing wildlife portraits. The first main section of this part goes over many points regarding getting close up to animals in their natural environments and strategies to do so. A lot of the techniques mentioned relate much to the strategies used in hunting as well. One of the most important things to do before going out and photographing wildlife is to study the natural history and background of the animals intended to shoot. The reasons why this must be done, is for the purpose of knowing how close you are able to get to an animal without disrupting their comfort zones and if not there is the risk of getting shots that are out of the animals natural being.
Sometimes there are animals that you need to keep around for hours or even days just to get them comfortable enough around you, so that they will loosen back up and act natural around you/the photographer. Other than stalking animals, there is always the option of using a blind which is best used on birds rather than mammals and should be strategically placed or used. A vehicle is a good blind because most animals are not intimidated by its appearance and does not present a huge threat. Also, depending on the distance from the animal, you may choose to either use a 700mm telephoto lens, or a standard 500mm lens. Sometimes baiting an animal with peanut butter and such items may be used, but that is optional depending on prided some photographers are.
The next section describes different ways to capture your subjects in action, within their natural habitats. Knowing your habitats is important for the knowledge that there are many wildlife refuges around everywhere, and with quick research it is easy to find where you need to be for certain species in their natural acts. Being on site early before the animal itself is up and moving is a good idea, because you will then be able to be in its habitat and catch their acts undetected with no disturbances to the animals natural acts. Finding your better angles and editing photos later is also another good way to get the actions shots you want and need, because for every second lost editing could be that second you need for that perfect shot. Knowing your camera is also important for example, when shooting smaller birds the camera needs to have a faster shutter speed in order to stop it in its motion.
While taking wildlife portraits it is important to know the advantages of using a telephoto lens and also there is a technique mentioned called the three-layer picture space. In the three-layer picture space there is a foreground, midground, and background. I think the most important part of this section lies in the anatomy of a wildlife portrait, which describes more than 17 different aspects that need particular attention while capturing a shot of a subject.
Tuesday, November 9, 2010
Part Two of book
Part two of the book focuses mostly on exposures, lighting, depth of field, designing your picture space as far as dominance and such. The first part on exposure brings up important information on a feature built into most new digital cameras. The histogram is used to determine points of accuracy of your exposure for a shot. Exposure is controlled by aperture size and shutter speed, which can be set to adjust automatically or be adjusted manually. It is important to know how to adjust exposure settings such as aperture priority, shutter speed, and knowing the different metering patterns used as well in order to adjust for different lighting situations and such.
Cameras stick to a neutral 18% grey basis; therefore, you must work against the cameras basic grey adjustments in order to correct it for a more quality picture. The best tip that the book presents about lighting is one that every photographer should know, and that is, try and avoid if at all possible shooting in the bright midday sun. This will only cause your shots to be overly bright, and your detail will be lost to the excessive contrast built up from the overly bright light. The best times to go out and shoot are sunrise and sunset, because the light gives you either front light which is good if you want to portray saturated color, contrast between different colors and fine detail in all parts of the scene; sidelight which produces long, deep shadows that reveal wrinkles, dimples, ridges and other details of a surface in greatest relief; and backlight is great if you want to dramatize on subjects with indistinct, shaggy, peripheries and features. Depth of field comes up and is basically being able to focus on one main part of a subject and defining one specific feature of it, while still revealing a quality portrait of the rest of the subject as well.
This is also used in landscapes where either there is one single or a couple of focuses going down the line of one large landscape portrait. Motion effects are mentioned as well where you can either catch a subject such as a hummingbird in mid-motion noticing that there is movement in its wings, while the rest of the bird seems to be still, as well as taking a shot of a stream and having the flow motion blurred from a slowed shutter speed shot. One of the most important sections in this part of the book fall into the dominance section and is a good idea for any photographer to have knowledge of. These are: Red is more attractive than yellow; Large draws more attention than small; difference draws more attention than conformity; jagged lines are more striking than curved ones; diagnol lines are more attractive than vertical ones; sharpness is more attractive than blur; and light is more important than dark. Another basic knowledge of photography mentioned is also the rule of thirds, which sometimes does need to be broken but only in necessary terms.
Sunday, November 7, 2010
11/04/2010 book blog post pgs1-50
I guess to begin this entry I will start with the section of Intrigue with Tiny Creatures. When I take photos, I more than often catch myself taking pictures of things such as leaves, plants, bugs and such close up and otherwise known as micro shots. According to the book, you cannot make frame filling records of subjects with plain standard lenses. It says that you must buy special close-up adapters that are either specially designed for the type of shooting, or macro lenses. Accessories that they mention include items such as screw on supplementary filters which work just like magnifying glasses.
This is useful to me for future use if I ever intend on really focusing more on macro shots and wanting them to come out with extra quality and they recommend two-element supplementary lenses for the purpose of quality. Another accessory that the book mentions and are somewhat inexpensive and are available in many stackable sizes are hollow tubes called extension tubes. The next section in the first fifty pages that I find useful is the chapter on super-telephoto lenses. Under the focal lenses section it begins by providing the basics that if you have a full-frame sensor, anything less than 500mm is too short and anything longer than a 600mm is too long. A 500mm lens is more ideal than a 600mm as well because it is only about four or five pounds lighter and allows for more mobility, therefore, less fatigue occurs to the photographer.
There is the argument that a 600mm lens does come in handy for those far shots on a very tiny subject, but more often than not, photographers will find themselves with over magnified images. The 500mm lens would be the most ideal for me if I was a professional photographer, being that I am the type that likes to go off trails and through rugged terrains. They mention ways that you can save on these lenses, or actually cheat build them in a way. To do this, you can combine either a 300mm or 400mm lens with 1.4X and 2X tele converters, but quality of an image will be compromised at comparable magnifications.
Thursday, October 28, 2010
Angle, Distance, and Yes!
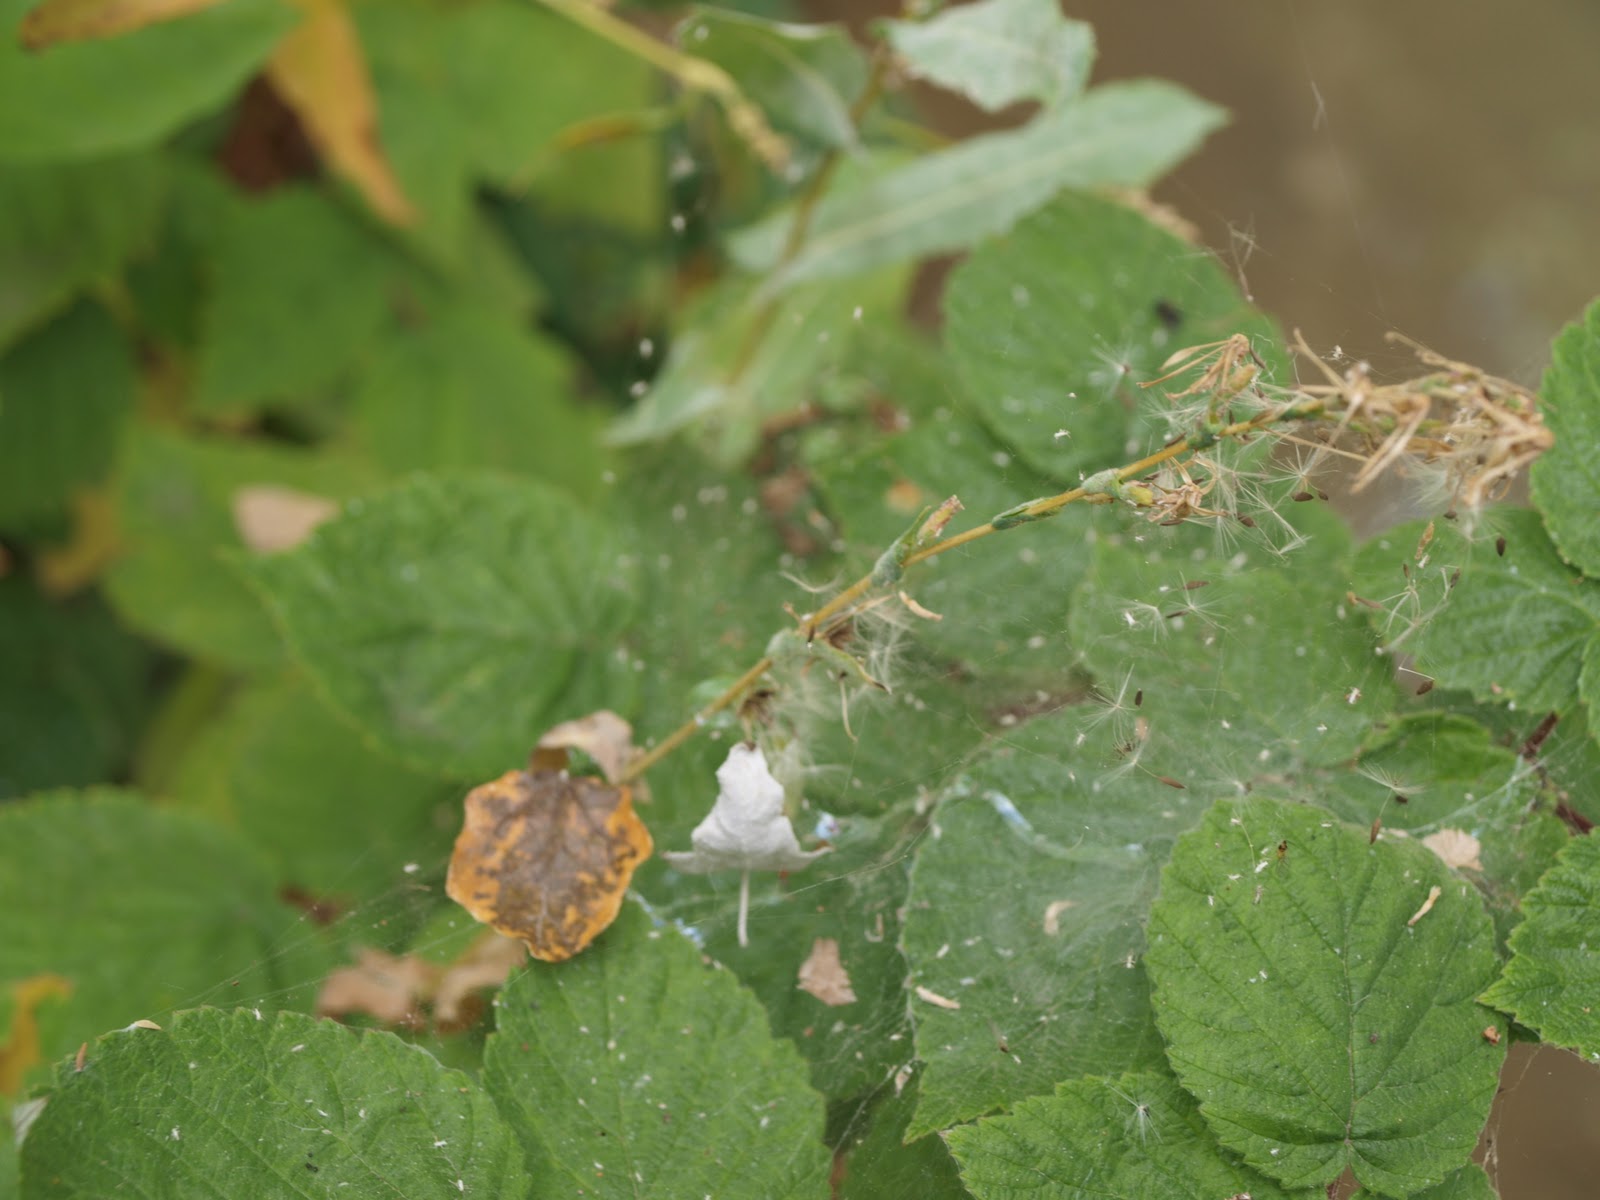
It is amazing of the many different angles that you can present basically the same picture. In these shots I was just randomly shooting out back of our house along a canal that crosses just on the other side of our fence. As I was shooting leaves and other things falling in and floating down it, I looked down and saw this plant with some sort of webbing on it. I thought it would be quite the neat picture. I looked at my first shot and realized that it really wasn’t all as great as I had figured it would be. After taking more pictures and getting ready to leave, I looked back down at the plant and was trying to think of a way to make the shot work.
I started repeatedly taking pictures of the plant with the webbing on it, and then got the idea of getting closer. Well, that helped a little bit but not of how I was wanting the picture to come out. Just before getting extremely frustrated with the pictures produced from my shots, I thought, “why don’t I just mess with the angles”. “Of course”! With the combination of trying different angles and moving closer, I was able to come to a shot that I liked. The last one I have posted is like being eye level with the plant, and turned out to be my best shot of it. The quality of the shot was great and has good detail on the webbing and other things attached to the leaves.


Thursday, October 21, 2010
Two articles ASSIGNED!
The Land of the Oz
Stepping carefully into Australia
The author of this article, Bill Hatcher, writes about his adventure into living in the new land to him from the Colorado Plateau to, Australia. The place he resides to is just on the outskirts of Sydney, Australia which resembles much of America’s southwest desert. The great thing for him, however, is that he does not live far from what is called the Australian Bush. The “bush” contains a massive variety of animals including some of the worlds’ most venomous snakes and spiders, which I might add that the spider thing would not be to my favor in any way shape or form. He asks a very important question to himself for living, and also as a photographer as well.
Since the author plans to be living in Australia for a few years, “as a photographer who often goes off the beaten path to shoot photos,” he asks, “ is just how dangerous is the Australian countryside. For his own knowledge, he does much needed background research on the wildlife both where he lives and in the Australian bush. Something that I found interesting that he had noted is that 11 of the world’s 15 most venomous snakes reside there in Australia, and that is including the sea snake, tai pan, and king brown snake. It is also full of many other types of wildlife such as tropical birds, much of what you would find in a jungle because the Australian bush is basically a jungle.
Bill’s main worry as a photographer, however, will rely on him being careful with his steps and observing not only surroundings, but the ground around as well. Most people whom get bitten by venomous snakes in the bush are generally bitten in the ankle, which can mean only one thing. For the most part people step on the snake or in its space causing it distress and then it bites. He explains that most of the snakes in the bush are not aggressive and just reclusive and the disruptions disturb their peace. The reason a snake could be considered most deadly is because they tend to have more human encounters, Bill explains.
The Masters of the European Landscapes
England
The author, William Sawalich, begins the article with the fact that American photographers began the foundations for modern mainstream landscape photography. In comparison to American landscapes, the author believes that European photographers emphasize intimate landscapes more so than vista. European photographers as well are concerned more with the form or abstraction and simplicity that are less location sensitive. In exploration of abstraction he says that the perspectives are less dramatic and the lighting is more quietly portrayed. Sawalich makes a good point about photography in his eyes, and kind of falls true to photography as I see it as well.
What fascinates him about photography is , “How an art form, on one level, the most perfectly descriptive, yet invented by man can transcend the overwhelming weight of bald description to evoke something unexpected. “ I think it’s neat to think about the world in a photographic kind of way, which is how I believe the author means it. To see many or all of the things you look at and view, and turn it into the vision of a picture. There are so many plain and simple sights that we see every day, and if we were able to convert that into a picture itself, it would portray much more than what was seen at the time. This all leads into what the photographer/author says to be his favorite place to photograph.
“My favourite place to photograph is the one with which I’m emotionally engaged at the time I’m making that image; all other locations pale at that moment. I feel like the author is very right about his statement. A picture is only at its best when the photographer him or herself is really feeling the shot and has full confidence that “this is the one”. Sure, there are many times that you can go out randomly shooting and get a really nice photo, but the true great picture would be that one that you want and emotionally feel enlightened when the shot is achieved.
Subscribe to:
Posts (Atom)